Felt Montessori Map (Introduction)
I've finally started the Montessori Felt Map from Imagine Our Life! This project has been on my wish list for over a year. So many things have slowed me down, including my own insecurities, but today I started cutting the felt!
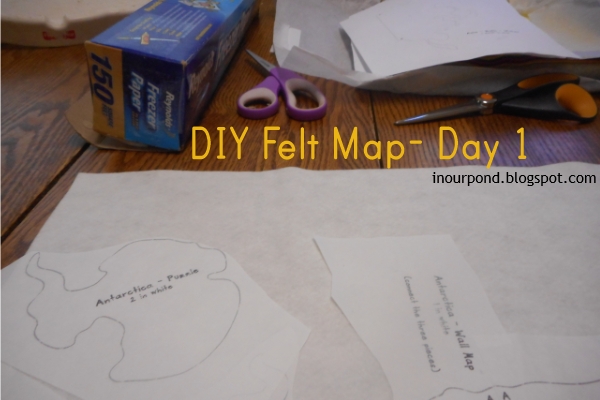
Today, I figured out how to print directly onto the freezer paper, which is a real benefit for a project with so many little pieces like this one. First, I ironed the freezer paper onto the regular computer paper. Then, I ran the altered paper through the printer, making sure that the freezer paper was heading the right direction. After the pieces were printed, I peeled the computer paper away from the freezer paper. Then, I ironed the freezer paper pattern onto the felt and cut the pieces out. The pattern can be used multiple times (at least 4 in my experience), which, once again, is very helpful in a detailed project like this map. Here's as much as I got done today:

I cut out the main "water" part, the stretched-out version of Antarctica, and two regular versions of Antarctica. I also printed a few more pieces and ironed some of them on felt to cut out at a later time.
Here are the rest of the details for the project:
Supply List
- pattern from Imagine Our Life (here)
- printer
- fabric scissors (Amazon)
- freezer paper
- clothes iron
- printable fabric (Amazon)
- felt glue (Amazon)
- sewing needles
- DMC embroidery floss (Amazon)
Felt List (from Prairie Woolens)
- 36" x 9" (1/4 of a yard) white wool blend
- 36" x 18" (1/2 of a yard) sandstone wool blend
- 36" x 18" (1/2 of a yard) robin egg blue wool blend
- 9" x 12" yellow wool blend
- 9" x 12" light brown wool blend
- 9" x 12" sunburst wool blend
- 9" x 12" bright red wool blend
- DMC floss #909, 3804, 817, 741, 307, 3023 (matched to the felt by Prairie Woolens)


I should try this for geography lessons! I featured your post in our Learn & Play Link Up! Thank you for sharing with us and hope to see there again next week!
ReplyDeleteThanks for featuring me on your link-up.
ReplyDelete