DIY Mini Christmas Decorations for Dolls and Elves
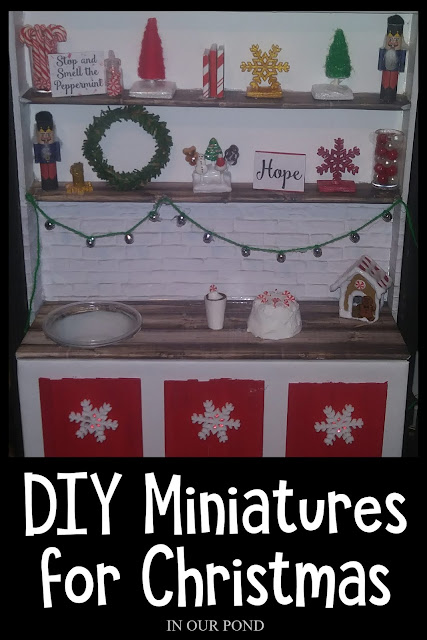
I've been busy filling up my Elf Suitcase House with handcrafted decorations. I wish the pictures were a bit better- maybe I can reshoot them next year when the sun shines again. For now, hopefully these cell phone snaps from my shadowy bedroom will be enough to get a good idea of what I've done. Most of the craft supplies with a few exceptions are basic and things I already had around my house. I've included complete supply lists for your convenience.
Peppermint Vase
- empty glitter jar
- fake candy canes
- peppermint nail art pieces
I first arranged the candy canes in the jar to get them the way I wanted, then I added a bit of hot glue in the middle of the to hold them to each other. I lifted the bundle of candy canes out and added the peppermint candies. A dab of hot glue in the middle of the candies came next, and I pushed the candy canes down on top while the glue was still hot. When it was all assembled, I hot glued it in place on the shelf.
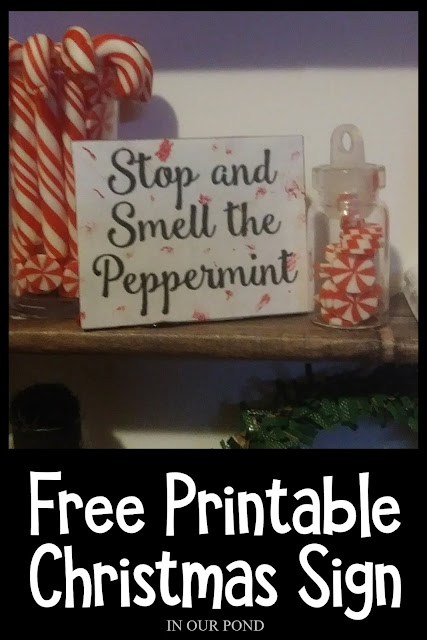
Smell the Peppermint and Hope Signs
- free printable
- scrap of white foam board
- red craft paint
- paintbrush
- glue stick
I designed the sign art after browsing Pinterest. The words "stop and smell the peppermint" came from Yellow Bliss Road (her design is better and perfect for your kitchen) and really spoke to me since I love peppermint! I cut out the sign and traced it onto the foam board (paperboard or cardboard would work too). Then, I painted the foam board with red paint on the sides. After it dried, I used a glue stick to attach the printable to the board. With a dry brush, I added some red smudges, then added a small piece of foam board to the back as a stand. It's also hot glued onto the shelf.
> > > Click Here to Download the Free Printable < < <
Peppermint Jar
- peppermint nail art pieces
- little jars from nail art glitter
This one is super easy. I just added the peppermint candies to the empty glitter jar, which I got at the Dollar Tree. The tiniest dab of hot glue keeps the candies from falling out. So cute.
Wrapped Trees
- scrap of white foam board
First, I cut a scrap of foam board into a 1 inch square. Then, I shaped and cut a scrap of paper into a tiny cone, using a glue stick to secure it. Next, I wrapped the yarn over the cone, gluing it as I worked. The truck of the tree is a piece of q-tip hot glued into the cone. I used regular hot glue to attach the tree to the foam board. For the snow effect, I broke out my second glue gun and used white glue stick to make drifts. Once the glue was cooled, I brushed the snow and one of the trees with glitter nail polish.
- free printable
- scrap of white foam board
- glue stick
I talked about the assembly of these little books on my Elf Books blog post. For these books, I wrapped the covers around scraps of foam board and secured them with a glue stick. Then, I hot glued them to each other and to the shelf.
Snowflake Trophy
- glitter nail polish- snowflake buttons
I painted the snowflake and the piece of foam board with glitter nail polish. Then, I hot glued them together. Easy as pie.
Nutcracker Dolls
- free printable
- hot glue sticks
- scrap paper
- glue stick
- paper q-tips
- mini pompoms
The printable Nutcracker from My Studio 3D is designed to go around a Pringles can for holiday treats. I used my computer to resize it to be about 1 3/4" tall. After printing and cutting, I used the doll wrap to measure the correct height on a glue stick and on the scrap piece of paper, which I cut into strips. Starting with the glue stick as the base, I began wrapping the paper, gluing every inch or so to keep it wound tight. When my inner paper tube was the size I wanted, I attached the printable with a glue stick.
For the hair, I pulled the cotton off q-tips and hot glued them in place. The arms are wrapped around the stick part of the q-tips and hot glued to the body. The hat and gloves (on the fatter one) are mini pompoms hot glued to their place. The fatter Nutcracker has 4 pompoms on his hat, because I didn't have a large one to put there. Like everything else, they're hot glued onto the shelves.
Gold Candle
- snowflake buttons
- glitter hot glue stick
I painted the snowflake with gold glitter polish like I did for the snowflake trophy. The candle is a piece of glitter glue stick that I cut to size and added more gold nail polish to the sides. Then, I hot glued the candle to the button. Dragonfly really wanted this addition, so I knew I had to include it.
Wreath
- evergreen pipe cleaners
One of the easiest parts of the decor. I wrapped one piece of evergreen pipe cleaner around itself to make a hoop. I'd like to add a gold bow, but I don't have anything to make one with at the moment.
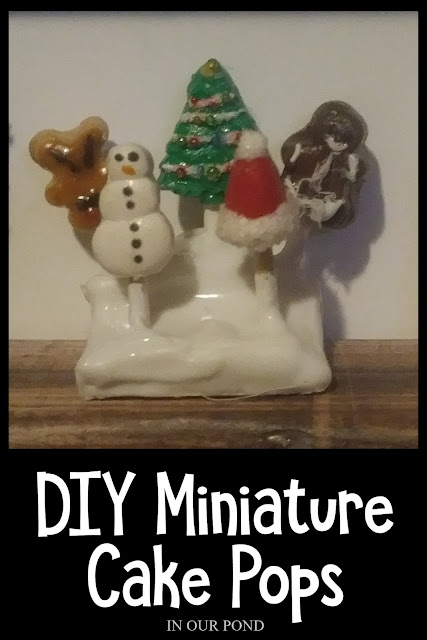
Cake Pops
- miniature cake pops
- scrap of white foam board
- white hot glue
I absolutely love these cake pops from Sweet Pea Toy Miniatures! They're so detailed and adorable! I stacked up layers of white foam board to make a cake stand and added a few holes to help the cake pops stand up. Then, I added the pops one at a time, securing them with white hot glue. After all the main glue had cooled, I added blobs of glue to the rest of the stand to make it look like snow or frosting. (oops- I just noticed that the gingerbread man has glue boogers on him)
Ornament Vase
- 6 mm red and white beads
- empty glitter jar
Another super easy one to make. I just took an empty glitter jar and added the beads to it. A bit of hot glue kept them from spilling. Then, I hot glued it to the shelf.
Coffee Cup with Whipped Cream
- free printable
- brown craft paint
- peppermint nail art pieces
- modge podge
- white craft paint
- corn starch
- paint brush
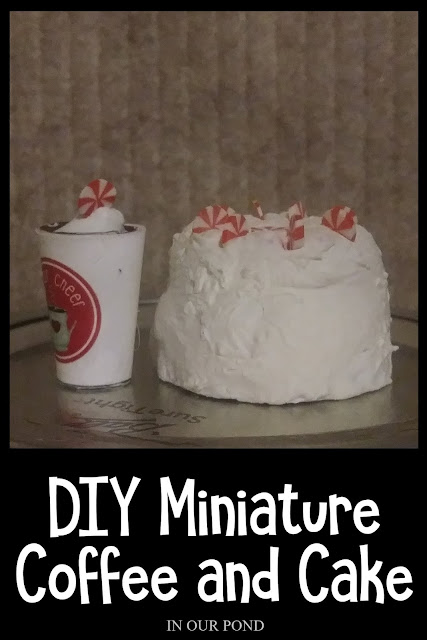
I featured the basic coffee cup design and free printable on my Doll Coffee Shop blog post. The directions for assembly can be found there. I saw an amazing craft whipped cream tutorial from My Froggy Stuff the other days, and I had to try it. In a small bowl, I mixed up modge podge, white craft paint, and corn starch together until it made stiff peaks. I used the back of the paint brush to mix and to add a dollop of whipped cream to the top of the coffee. A tiny slice of peppermint nail art completed the adorable peppermint latte.
Peppermint Cake
- Barbie plastic cake
- peppermint nail art pieces
- modge podge
- white craft paint
- corn starch
- paint brush
I had a cheap, plastic strawberry cake that I bought as part of a Barbie accessories pack. Since I had so much fake whipped cream left over from the coffee, I decided to use it to "frost" the cake. It's not the most beautiful cake, and I'm still trying to decide if I want to add more to it, but I like the way it turned out. Like I did with the coffee, I added peppermint slices to the cakes. Have I mentioned how much I love peppermint? Yum!
Gingerbread House
- paperboard
- scrap of white foam board
- white hot glue
- gingerbread man button
- peppermint nail art pieces
This gingerbread house was one of the first things I crafted this year. I started with four pieces of paperboard shapes for the walls and a scrap of 1x1 inch foam board for the base. Using my favorite white hot glue, I began assembling the house like you would make a real one, one side at a time, adding glue frosting at each join. After the house corners were cool, I added a rectangle for the roof. The next part was the hardest because I had to be patient to not put my hand in the glue as I worked. Slowly, I added hot glue to the base of the house, the joints, the roof, and around the door. I added a gingerbread button and peppermint candy to the front of the house to finish it.
Which one is your Favorite? Comment below!
Pin It!







Comments
Post a Comment
Thank you for commenting!